Tablet
Many users will use Scratch applications on a tablet. Therefore we should take care in our program to make it work with a tablet.
Tablets do not have a keyboard so the only input is the pointer.
https://scratch.mit.edu/projects/396114914
Introduction
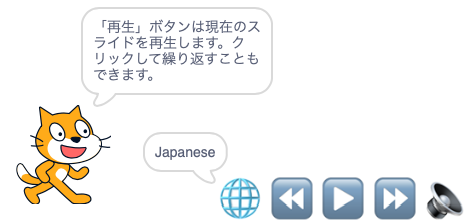
We are going to develop a short, tutorial-type program. This program has 10 slides. Each slide has a title and most of the slides have icons. Scratchy is the narrator and displays the text. At the bottom there is 5-button navigation menu.

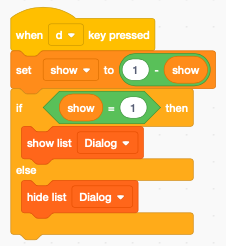
Dialog
There is one line of dialog per slide and it is kept in the list Dialog.
These are the 10 lines of text (or dialog).

Languages
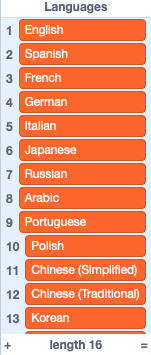
In our program you can choose among 16 different languages. These languages are kept in the list Languages.
Backdrops
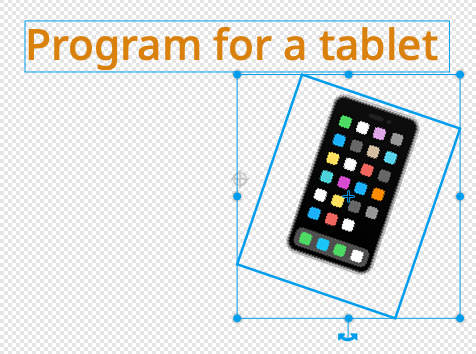
The backdrops are all vector images. This allows to easily change the titles. It also gives perfect resolution in full-screen mode. The smartphone image below is an emoji. That is a very useflul method for getting high-resolution icons.
The stage
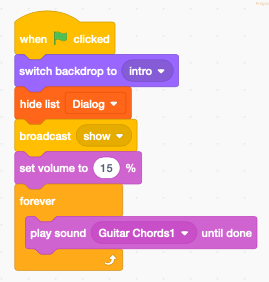
At the start we:
- switch to the title slide (intro)
- hide the Dialog list
- broadcast show (this hides all sprites which are not visible on this slide)
- set the volume for the background music to a low value (15%)
- enter the forever loop to play the background music
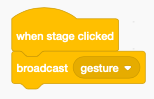
Only the stage receives the when stage clicked event. The sprites only have access to their own when sprite clicked event.
When the stage is clicked (outside of a sprite), the message gesture is broadcast. It will be dealt with in the code of the Gesture sprite.
The next function is a helper function to show the dialog. It is only used during development. Scratch can display at the maximum 13 lines of a list. Typically the backdrop editor is open, and you add a line of text for each backdrop, taking care to keep the same numbering.
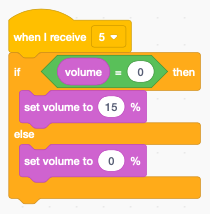
Only the stage can change the volume of its background music. The broadcast message number 5 is used to toggle the music. This corresponds to the button number 5.
Scratchy the narrator
Scratchy is our narrator. The speech bubbles are the only way to display text under program control.
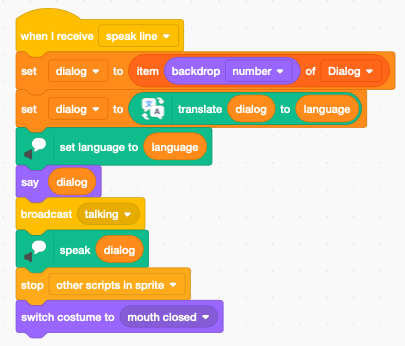
When the sprite Scratchy receives a speak line broadcast it:
- takes the line of dialog which correspond to the current backdrop number
- translates this to the chosen target language
- displays (say) the dialog in a speech bubble
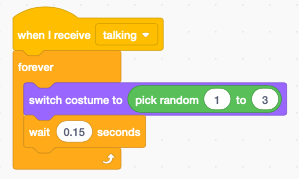
- broadcast talking (to start moving the mouth)
- speak the dialog in the selected language
- stop the talking script
- close the mouth at the end of the dialog
The mouth movement needs to be done in a separate loop.
The icon menu
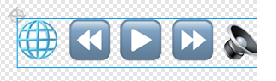
Sprites are clickable. It would be possible to have a separate sprite for each menu button. Here we use a different approach. We have one single sprite which is made up of a string with 5 emoji characters.
We ajust the total size of the string to 250 points, so that each emoji has a width of 50 points. The origin is also important. The origin marker is placed in the upper left corner.
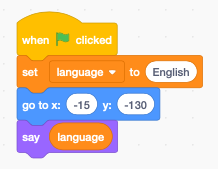
At the start of the progam we
- set the language to English
- place the sprites
- display English in the speech bubble
Displaying the language next to the globe, makes its meaning clearer to the user.
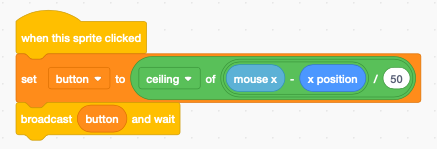
When this sprite is clicked, we
- calculate the mouse position from the x-origin of the sprite
- divide by the button width (50)
- round up (ceiling)
This will give us a number from 1 to 5 which corresponds to the button clicked. We broadcast directly this number.
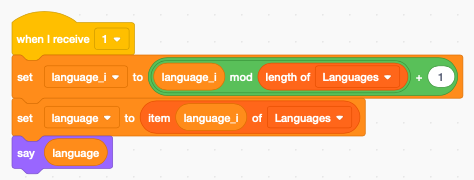
Button 1 (globe) increments the language index. We have to keep the index (language_i) in a variable.
Button 2, 3 and 4 are navigation buttons.
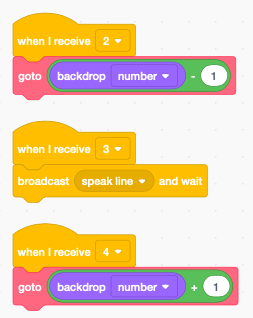
This is the function to go to a new slide
- switch the backdrop
- show/hide the sprites
- speak the new line of dialog

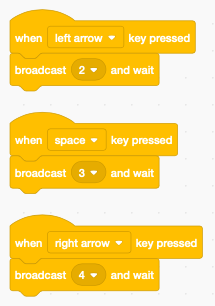
The last 3 scripts are a convenience when using a keyboard:
- left arrow : previous slide
- space key : replay current
- right arrow : next slide
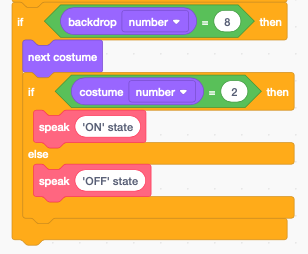
A click button
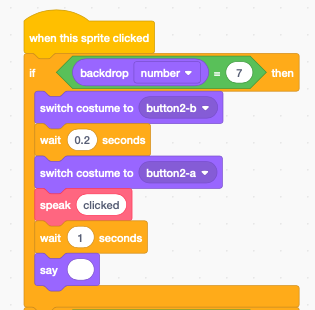
This example button is only shown in slide 7 and 8. In slide 7 it works as a click button. It:
- switches to the second costume (orange)
- waits 0.2 seconds (a brief flash)
- switches back to the first costume (blue)
- it prononces clicked
A toggle button
In slide 8 the same button behaves as a toggle button with two states. It toggles between costume 1 and 2. The costume number is used as the state variable.
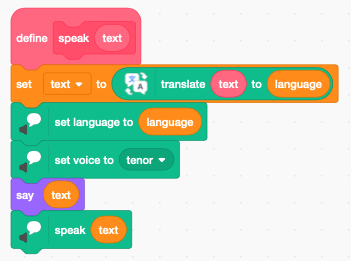
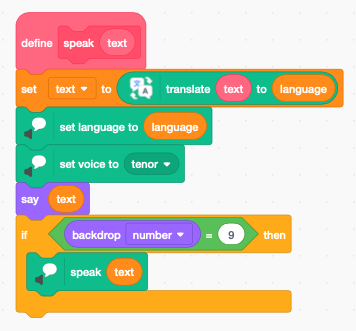
The function speak pronounces the text argument in the selected language. To make it different from Scratchy we set the voice to tenor.
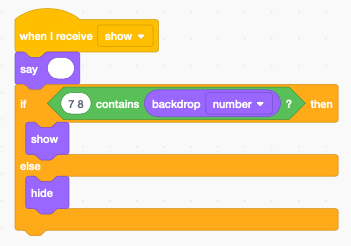
Finally the show broadcast, hides the speach bubble, and then shows the button sprite only if we are in background number 7 or 8.
Pointer gestures
On tablets, Scratch does not provide a soft-keyboard. To use one, we would need to program it in Scratch. However mouse clicks and gestures are the natural way of interacting with a tablet.
To give the user some feedback, we visulize the result of the gesture. On the following image we see three simple clicks. An explanation of the gesture is visible for 1 second.

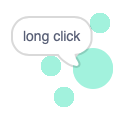
If we press longer than 0.3 seconds, the click is detected as a long click. In the image below we have 3 normal clicks and one long click.
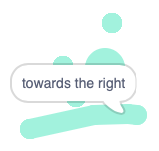
This is a gesture towards the right. It can be used to go to the next page.
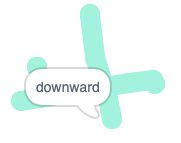
This is a gesture towards the bottom.
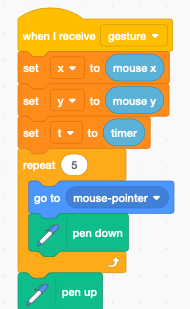
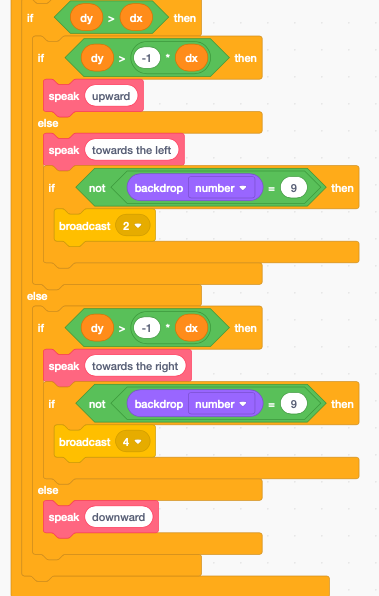
The gesture algorithm
At the start we record the initial mouse position (x, y) and the time t. The the Gesture sprite goes for 5 frames to the mouse position with the pen down.
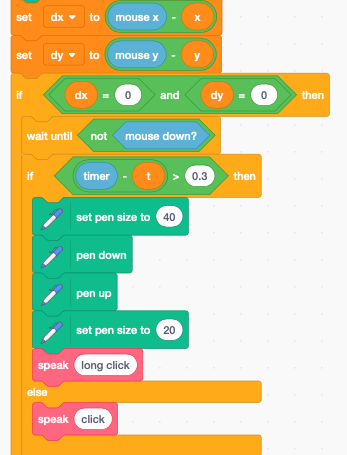
At the end of the gesture, we calculate the displacement vector (dx, dy). If the displacement vector is zero, we have a click. We then wait until the mouse is up and look at the elapsed time.
If it’s more than 0.3 secondes we have a long click and we draw a bigger circle, to make it visually clear to the user.
If the displacement value is not zero, we determine in which direction it is. The line dx=dy is the diagonal which goes up from left to right. The line dx=-dy is the diagonal which goes down from left to right.
Using these conditions, we obtain the 4 cases
- towards the left
- towards the right
- upwards
- downwards
Because of the automatic translation we make the words in English as specific as possible. That is the reason of not just using left/right or up/down.
We want to use text as a means of feedback for gestures on all 10 slides. However the speaking voice, we only want it in slide number 9, where we present gestures.
Virtual keyboard
Tablets use a virtual keyboard. With the ask () and wait block the virtual keyboard of the tablet OS can be used. To have more control, you can also program a virtual keyboard within Scratch by yourself.
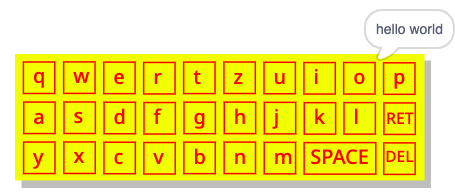
We create the image of a single key by drawing a rectangle with a single letter inside. Make the size about 32 points wide. Select both items and group them.
Then copy-paste that key and align the second key with the first one. Use a horizontal (and vertical) spacing of 40 points. Then select the two keys and copy-paste them again and align. Repeat with 4 keys to get 8 keys. Continue this to obtain a keyboard with 3 lines of 10 keys. Then you relabel the keys according the keyboard layout you want to show (qwertz…).
Then place a colored filled rectangle behind the keys. You can add a second grey rectangle to add a shadow. Place the origin of the sprite to the lower left corner.
Decoding the keyboard
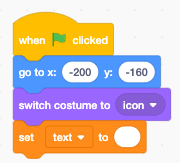
At the start we:
- position the sprite to the lower left corner
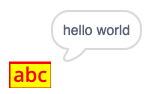
- switch the costume to icon (small keyboard icon abc)
- set text to an empty string
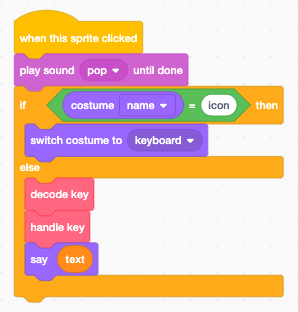
When the keyboard of the icon is clicked we:
- play a sound
- switch to the costume to keyboard if the costume was the icon
- decode the key
- handle the key
- display the new text
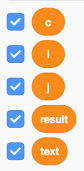
Variables
The code for this sprite needs 5 variables:
- c - the current character pressed
- i - the horzontal index
- j - the vertical index
- text - the current text
- result - the return value for the substring* function
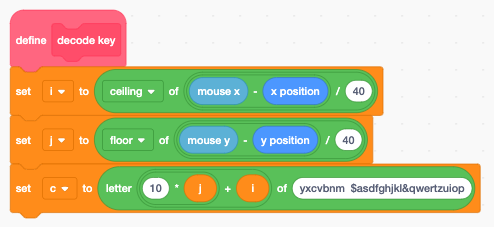
Decode the key
Based on the mouse position, we can obtain the indexes (i, y) of the pressed key.
- using ceiling the index i goes from 1 to 10
- using floor the index j goes from 0 to 2
Then we combine the two indexes with the expression (10*j) + i to get an index from 1 to 30 which we use to look up the character pressed.
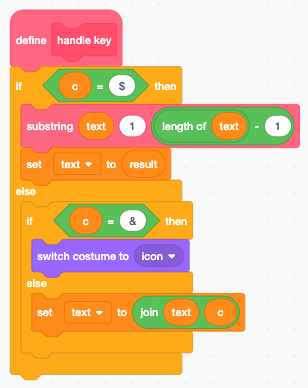
We use 2 special characters
- $ to indicate delete
- & to indicate return
When handling the key we look at the current character c and
- delete the last character when it is $
- return to the icon costume when it is &
- append it to text otherwise
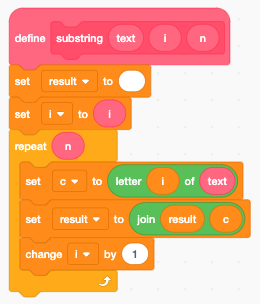
To delete the last character of texte we need the substring function.
The substring function returns a substring of text starting at position i with a length of n and returns it in the variable result
This is the keyboard after entering the text hello world.
This is the icon after pressing the RETURN key.
This is the online version: