Scenario
Many Scratch projects involve story-telling such as:
- tutorials
- animations
- comics
- music videos
The common trait is a linear progression. There is a beginning and an end. In this section we create a framework to easily order and manipulate
- dialog
- sprite movement
- background
- sound
The basic idea is to use a script or scenario. It is a list where each line describes what happenes at that moment of the story.
It contains the
- dialog of all actors
- when and what they do
- where they are
https://scratch.mit.edu/projects/399904114
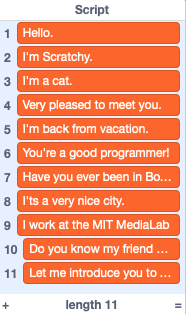
The Script list
The main data structure of this program is the Script list. It contains all lines of dialog.
In order to create the scenario, it is easiest to show the Script and edit it by:
+add a new itemxdelete the item- (return) add new item
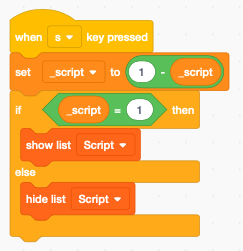
Pressing the S toggles the boolean _script variable and shows or hides the Script list.
Add a comment
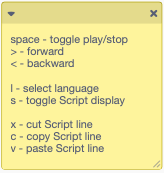
The canvas contains a comment to give an overview of what the program can do and how to use the program.
The progress bar
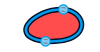
To indicate the progression, we will use a progress bar, like the one used in Youtube.
We call the costume bar, make it red like in Youtube, without an outline. The important thing is to make it exactly the lenght of the screen (480 pixel) and 10 pixel high.
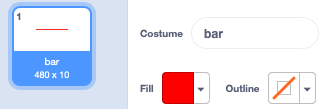
It must be placed so that the origin is exaclty in the center.

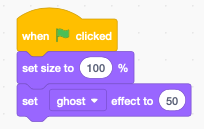
At start we set the size to 100% and the ghost effect to 50% transparency.
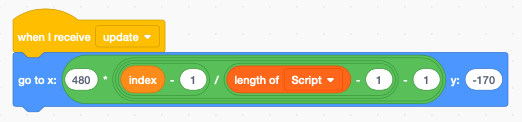
When the script index moves we update the porgress par. It covers the complete area of the screen.
The play/stop button
Besides the progress bar, the play/stop button is the major user interface element. When the program loads, it starts playing from the beginning.
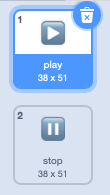
We create a new Sprite called Bar which has two costumes:
- the play button
- the stop button
Both are centered and have the same size (38x51 pixels).
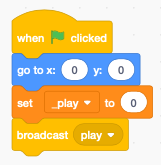
At start we
- place the sprite in the center
- set _play to 0
- broadcast play which will start playing
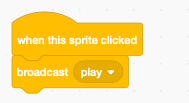
Pressing the space key toggles between play and stop.
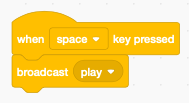
Clicking the large, half-transparent play/stop button does the same.
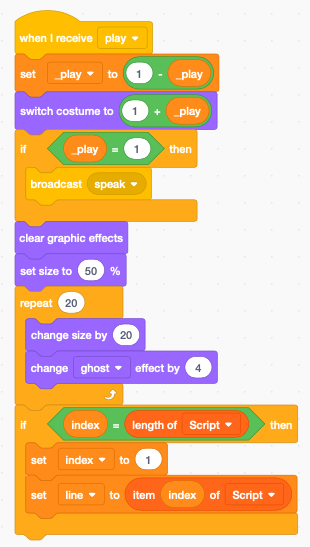
The _play variable is a boolean variable which toggles between 0 and 1. Adding 1 to it let’s us set the costume.
- _play=0, stopped, show the play button (costume 1)
- _play=1, playing, show the stop button (costume 2)
If _play=1 broadcast the message speak.
Each toggling of the play/stop button executes an animation:
- start small (size=50%) at the center
- grow larger and become transparent
If the index is on the last script position, we set the index to the first position. This allows to restart from the beginning and not with the last script position.
Speak different languages
We are going to use Google translate and Text-to-Speech to display and speak the dialog in several languages.
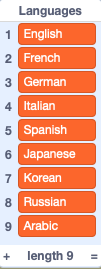
The Languages list contains the 9 preconfigured lanugages.
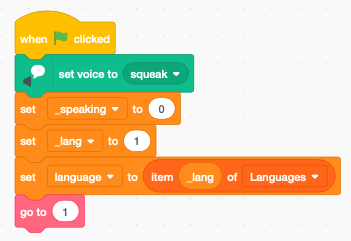
At start we:
- set the voice to squeak (seems appropriate for Scratchy)
- set the language index _lang=1 (English)
- go to line 1 (and start speaking)
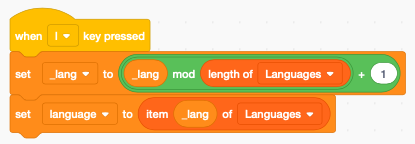
Pressing the L key cycles through the 9 preset languages.
Set the line
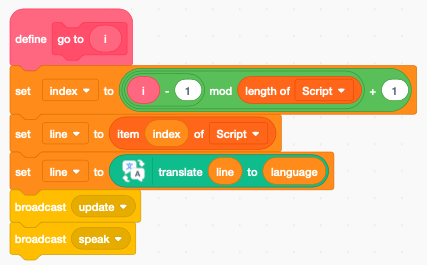
To set the current line number we create the function go to (i) It sets the current line to a number from 1 to lenght(Script). The function
- limits the index variable to the correct range using a mod expression
- sets the line variable to the Script item pointed index
- translates the line to the current language
- broadcasts update to set the progress bar
- broadcasts speak to display and read out the line
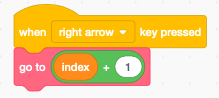
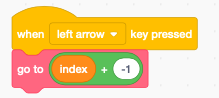
Now we can use the arrow keys to increment the line (right)
or decrement the line (left)
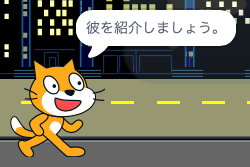
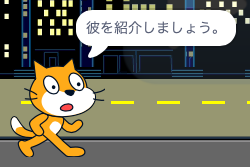
Speak a line
First we display the speech bubble. Then we speak the line, unless we are currently already speaking.
If _play=1 then we:
- wait 0.5 seconds
- go to the next line (and read it)

Cut, copy, paste
To edit complete lines of the Script list we add the three standard functions:
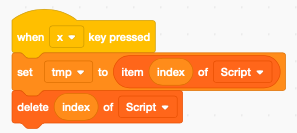
- cut (x)
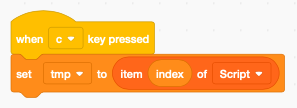
- copy (c)
- paste (v)
Cutting a line copies the current line first to the tmp variable and deletes the item.
Copying a line just copies the current line to the tmp variable.
Pasting a line inserts the tmp variable at the current index position.
Draw the mouth
To give the indication of speaking, we should animathe the mouth. Duplicate three times the first cat sprite.

Now color the mouth of the first sprite with 70% red.

The cat sprite will look like this:
Now use the reshape tool to remove picture points.

Remove the edges of the mouth to get this.
The cat sprite will look like this.
Remove the mouth completely. Draw a new black line with a with of 2.4 points. With the reshape tool click in the center and pull the line downwards until you get this:

The cat sprite will lok like this:

Animate the mouth
To create the animation, we select randomly one of the 3 mouth sprites. In between we wait 0.1 seconds. The loop repeats forever, and is stopped from the other script.
